Site Settings
Introduction
The Settings section in Aether CMS provides comprehensive control over your website's configuration, appearance, and behavior. This powerful area allows you to customize every aspect of your site, from basic information to advanced features.
Accessing Settings
To access the Settings page, click on "Settings" in the sidebar navigation. The Settings interface will load, displaying a tabbed interface with various configuration categories.
Interface Overview
The Settings interface consists of several key components:
- Tabs Navigation: Provides categorized access to different setting groups
- Settings Forms: Contains the configuration options for each category
- Action Buttons: Allows you to save or reset changes
- Menu Editor: A specialized interface for managing main navigation menu
Settings Tabs
The Settings page is organized into multiple tabs, each containing related configuration options:
- General: Basic site information and configuration
- Appearance: Visual customization options
- Content: Content display and management settings
- Advanced: Performance and code customization options
- Menu: Menu management interface
- Static Site: Static site generation options (admin-only)
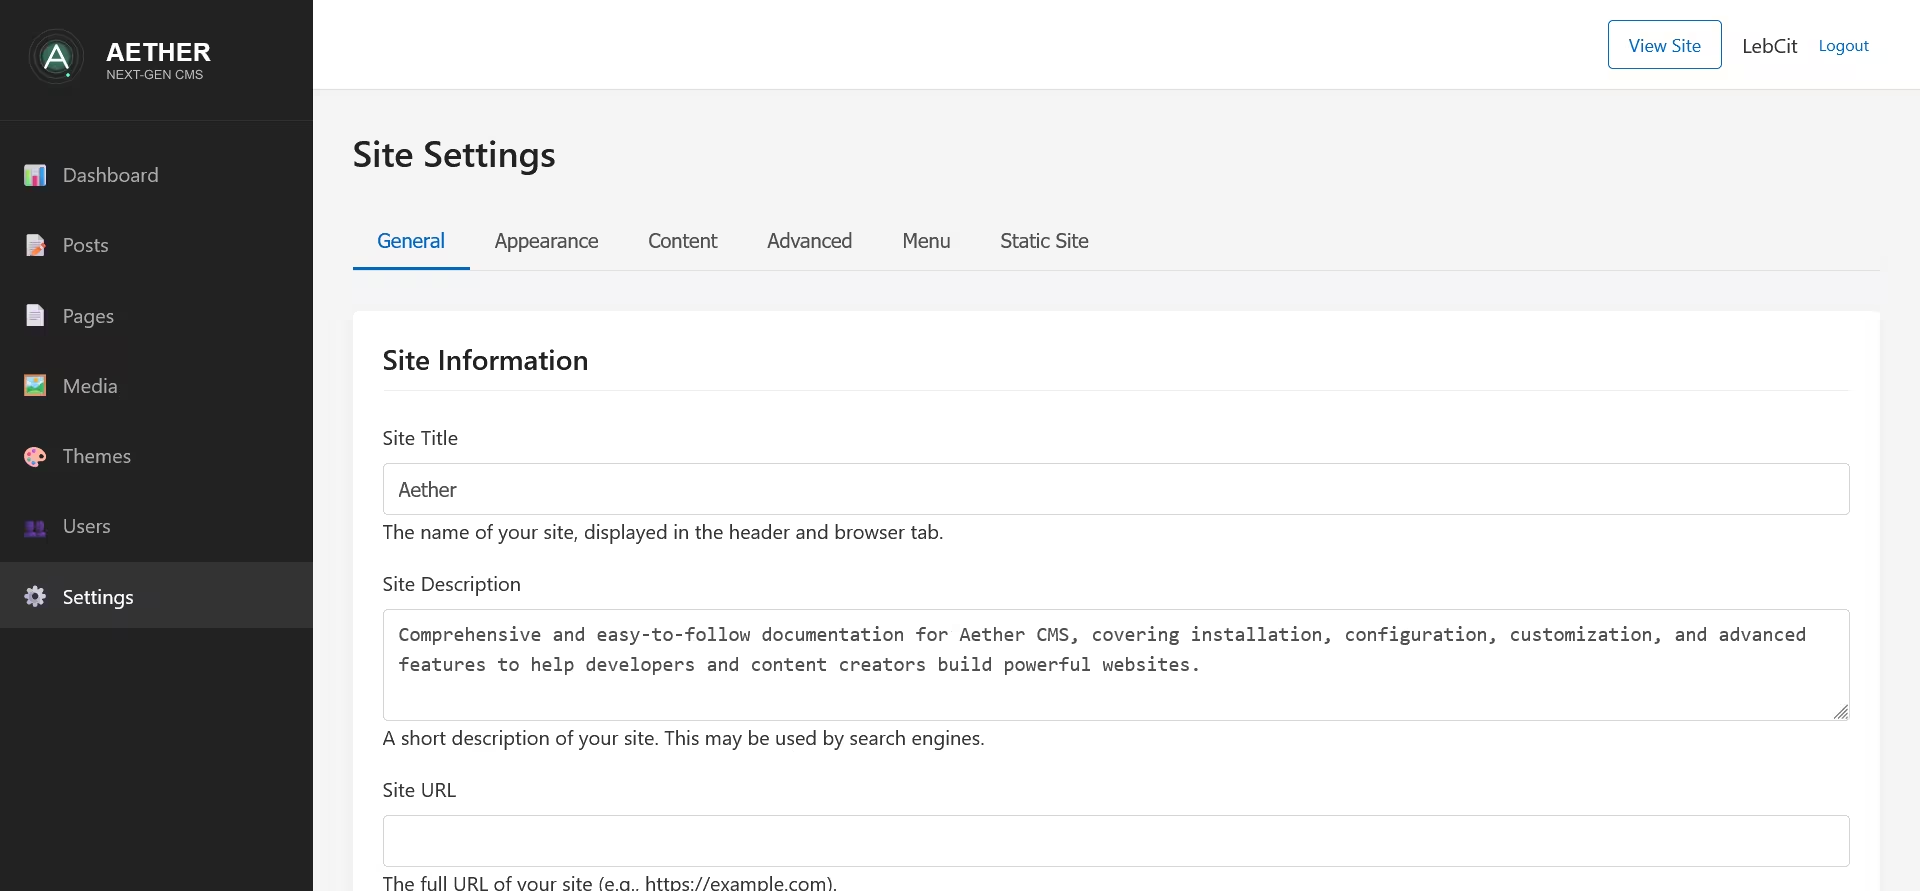
General Tab
The General tab contains fundamental site settings:
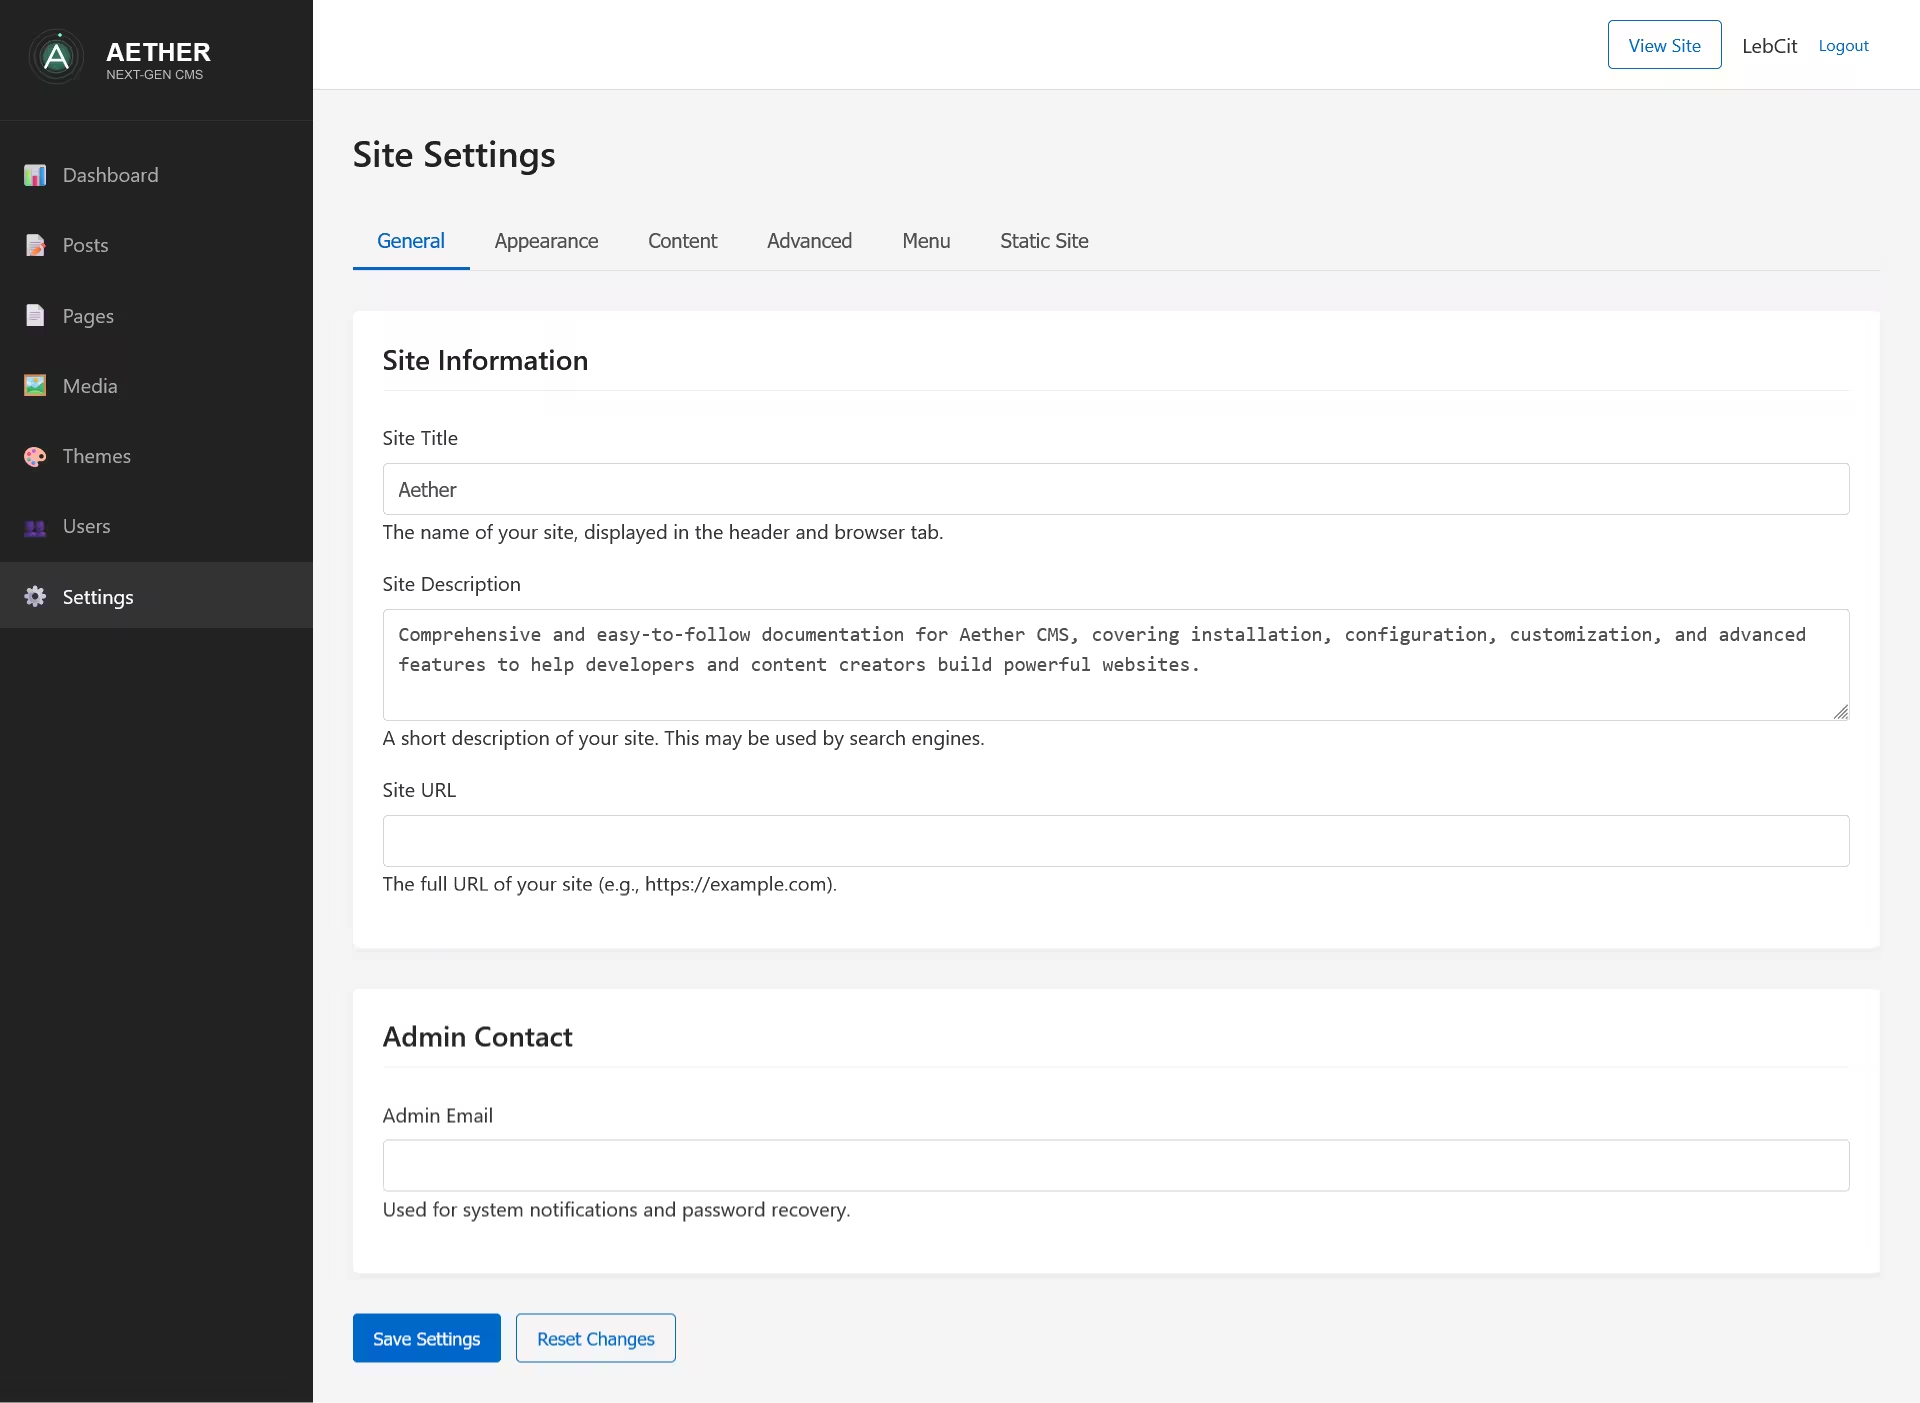
Site Information
- Site Title: The name of your website (displayed in browser tabs and headers)
- Site Description: A brief description of your site (used by search engines)
- Site URL: The full URL of your website (e.g., https://example.com)
Admin Contact
- Admin Email: Main system administrator email (Future enhancement: email address used for system notifications and recovery)
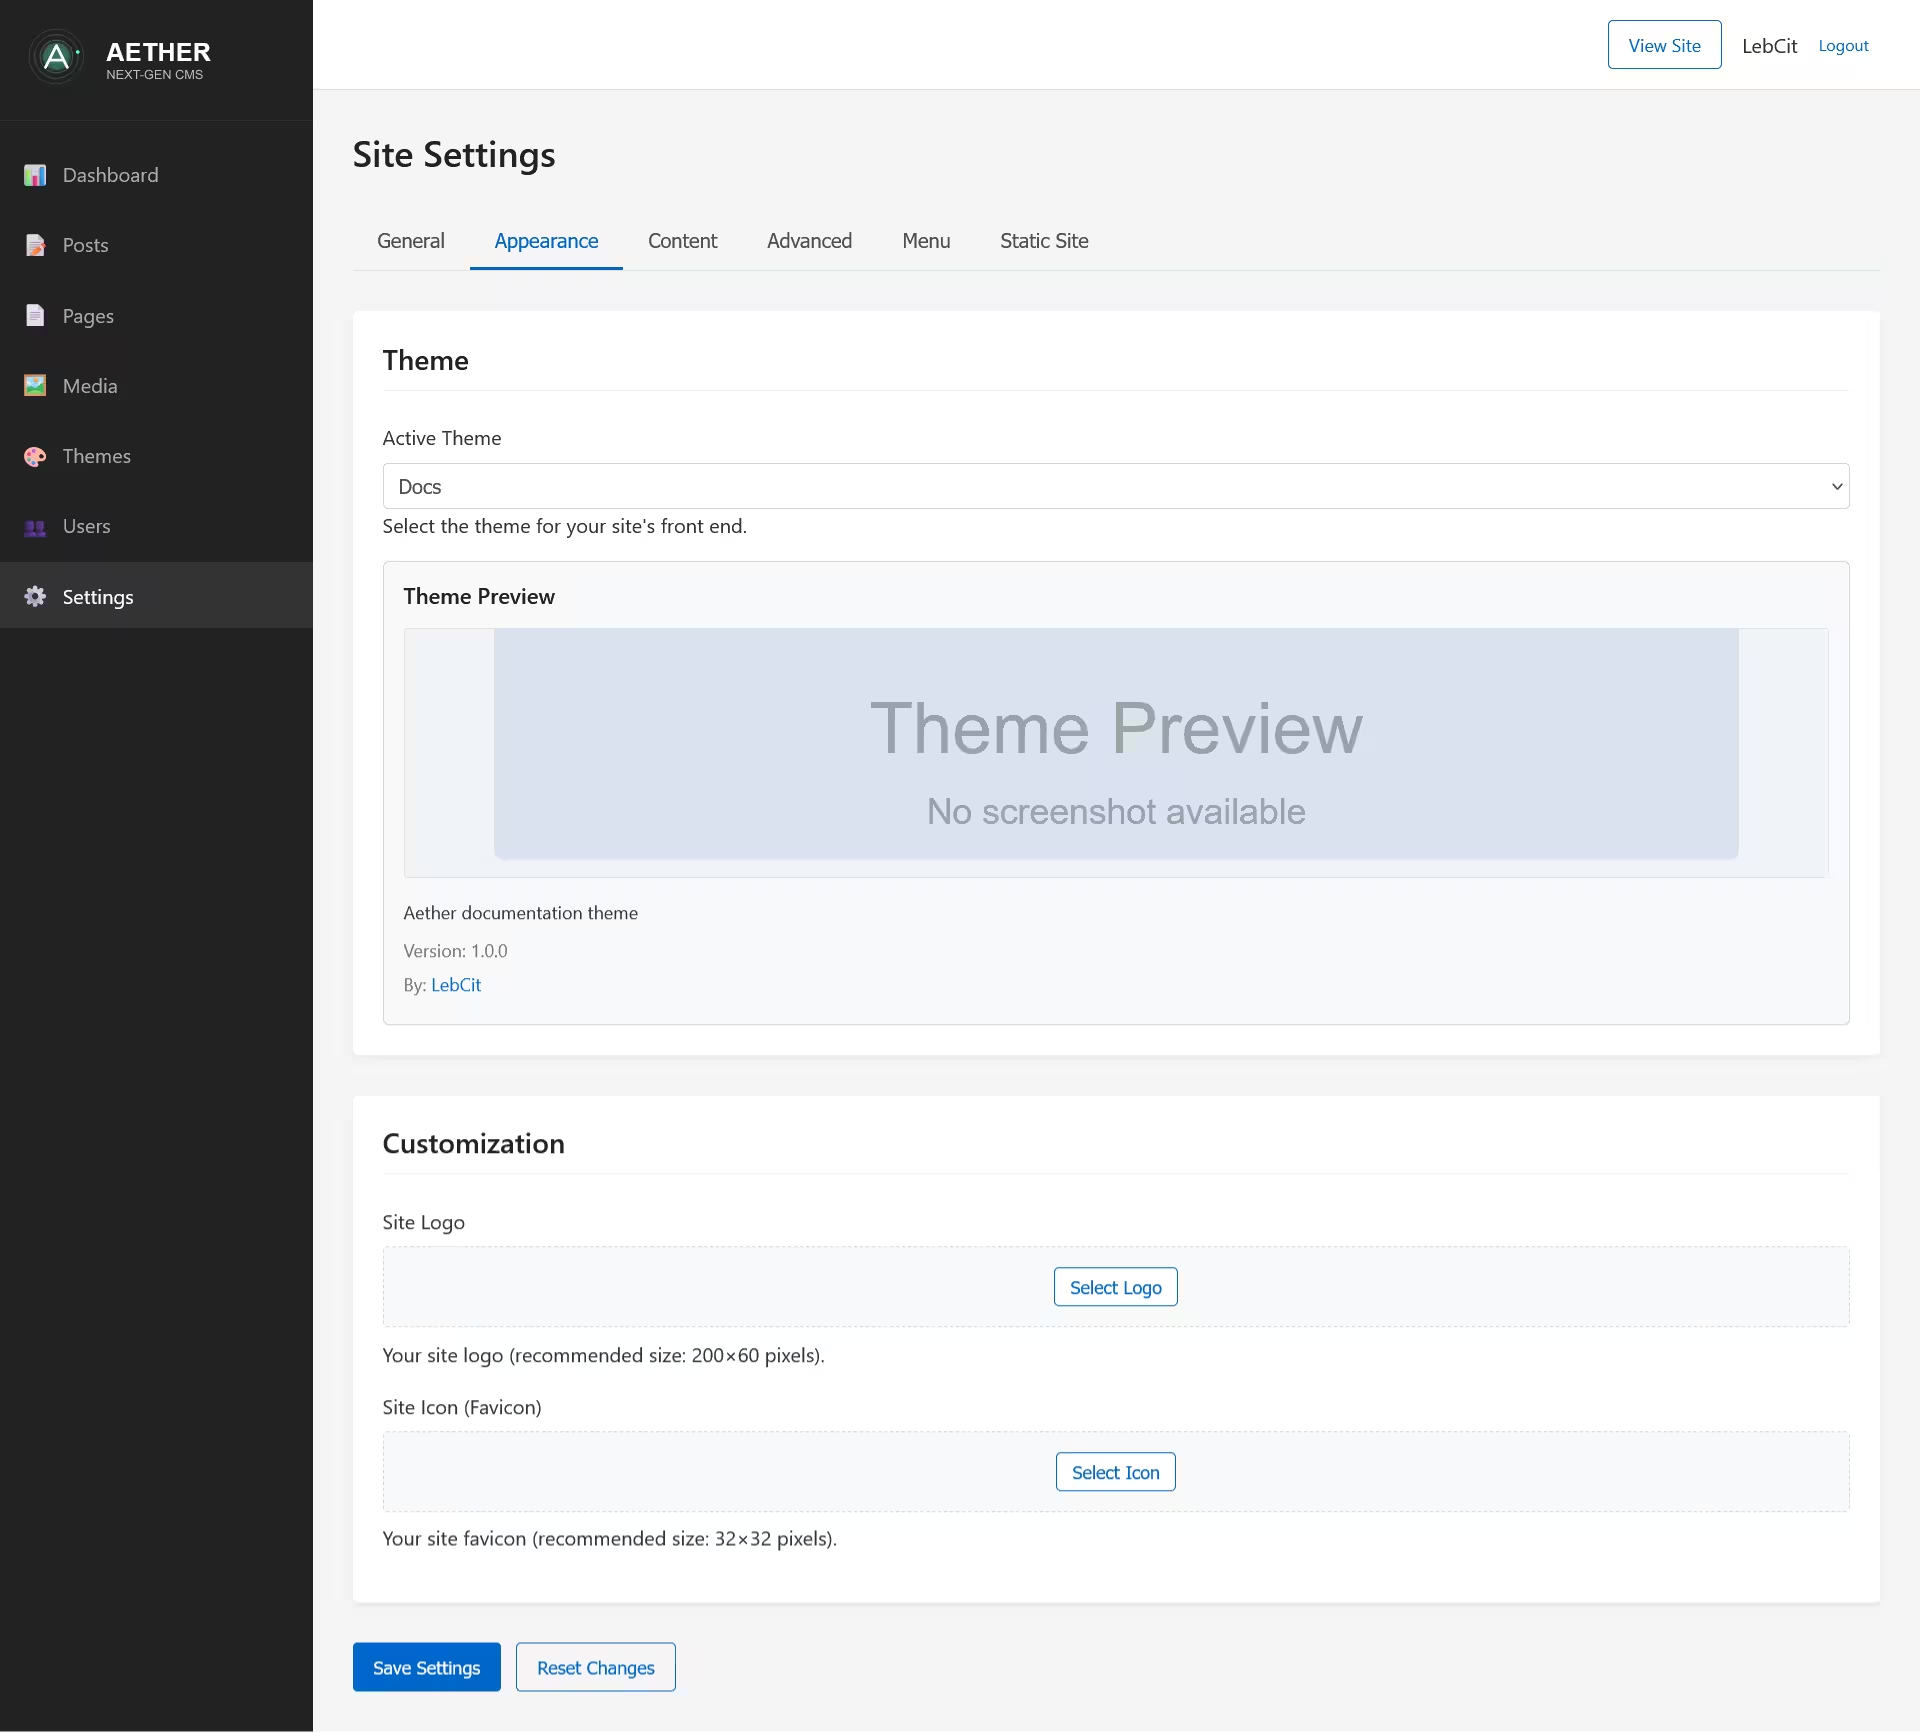
Appearance Tab
The Appearance tab controls the visual aspects of your site:
Theme Selection
- Active Theme: Dropdown menu to select from installed themes
- Theme Preview: Visual preview of the selected theme
- Theme Information: Description, version, and author details
Customization
- Site Logo: Upload or select a logo image for your site
- Site Icon (Favicon): Upload or select an icon for browser tabs
Media Selection
To set a logo or favicon:
- Click the Select Logo or Select Icon button
- A media selection modal will appear
- Choose an image from your media library or upload a new one
- Click Select to apply the image
To remove a logo or favicon:
- Click the Remove button next to the image
- The image will be removed, and the selection button will reappear
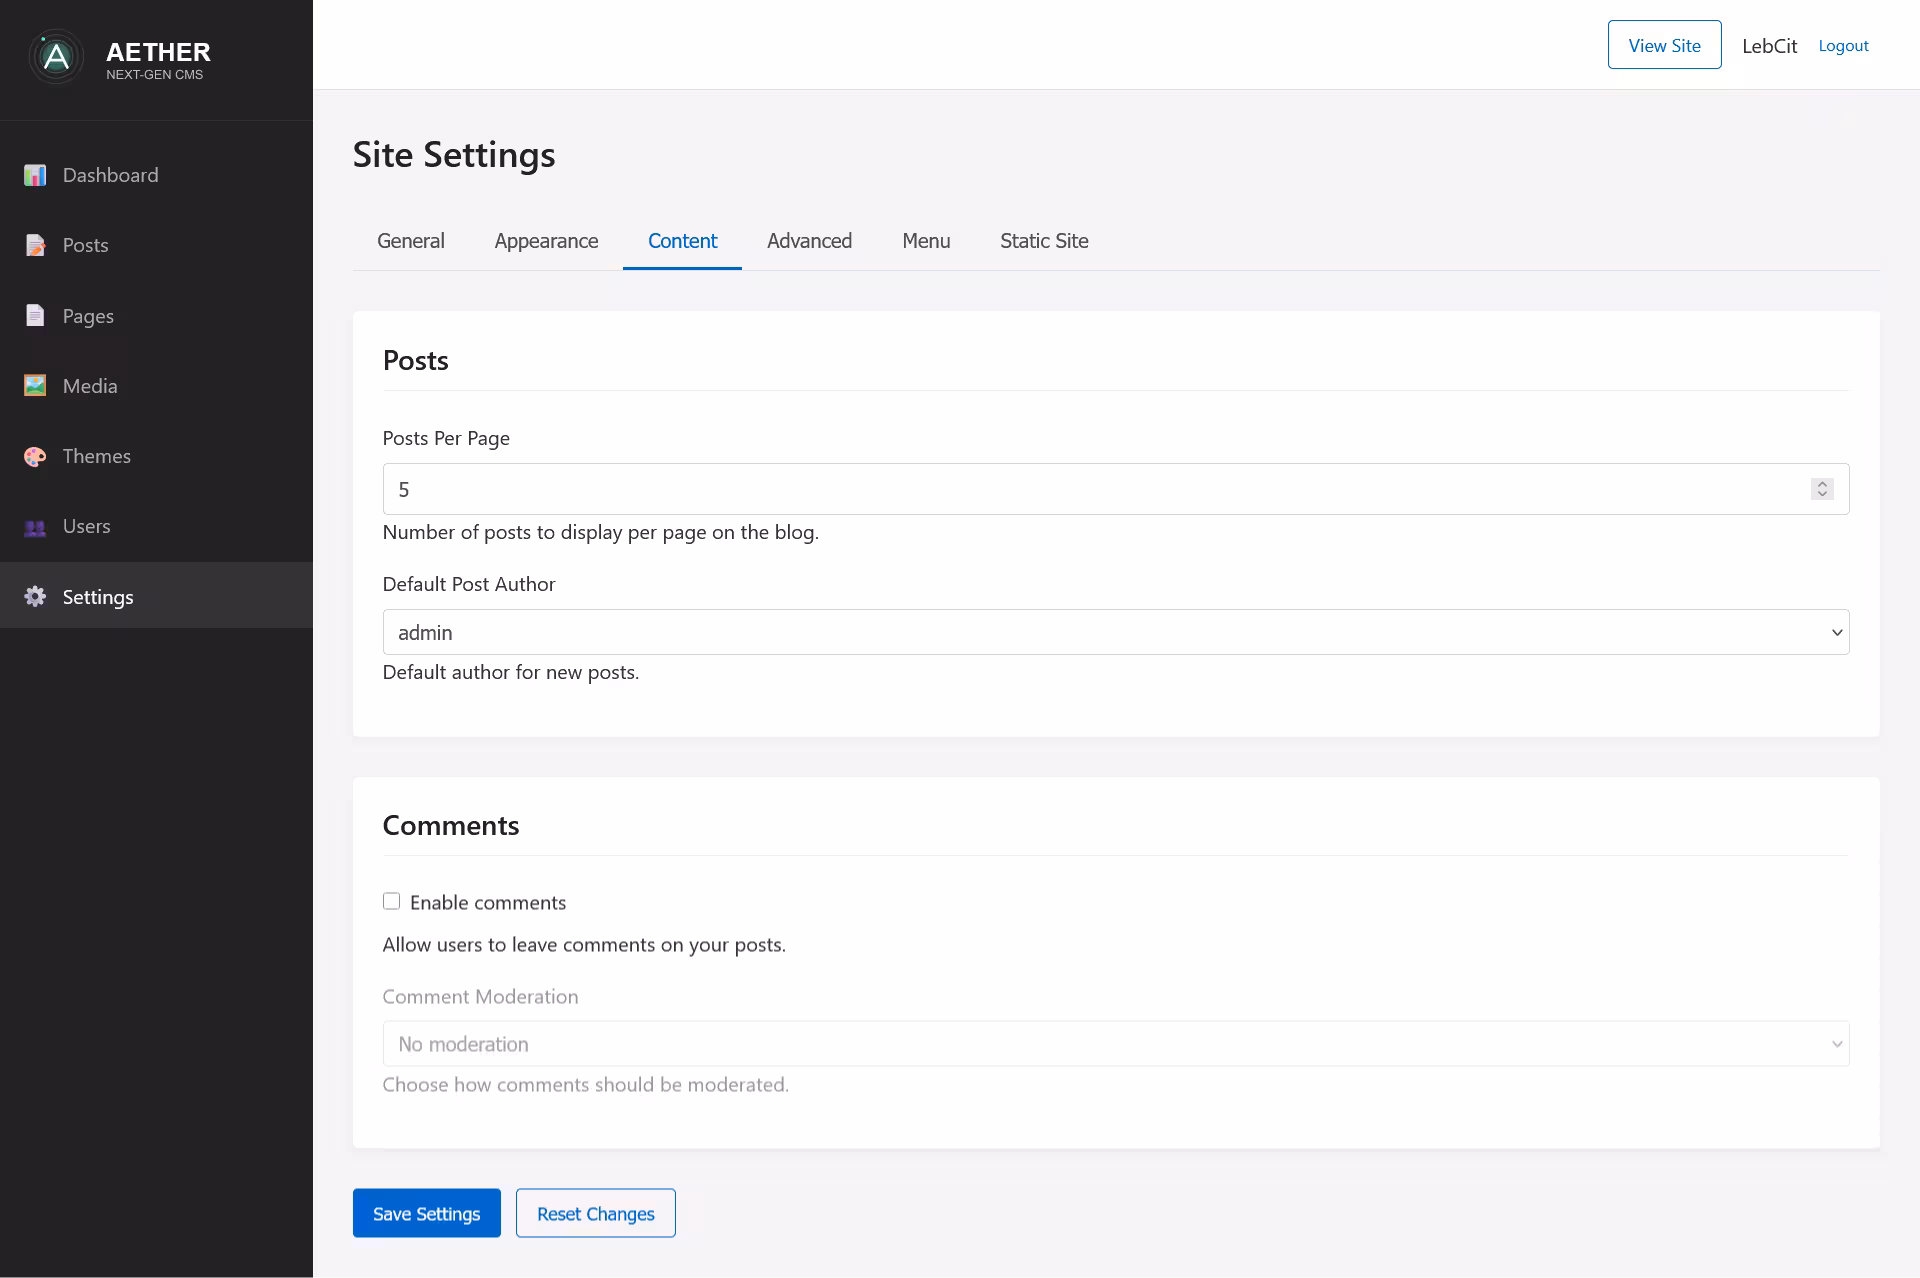
Content Tab
The Content tab controls how content is displayed and managed:
Posts Settings
- Posts Per Page: Number of posts to display per page on the blog
- Default Post Author: Default author for new posts
Comments Settings
- Enable Comments: Toggle to allow or disable comments site-wide
- Comment Moderation: Options for moderating comments
- No moderation
- Moderate first-time commenters only
- Moderate all comments
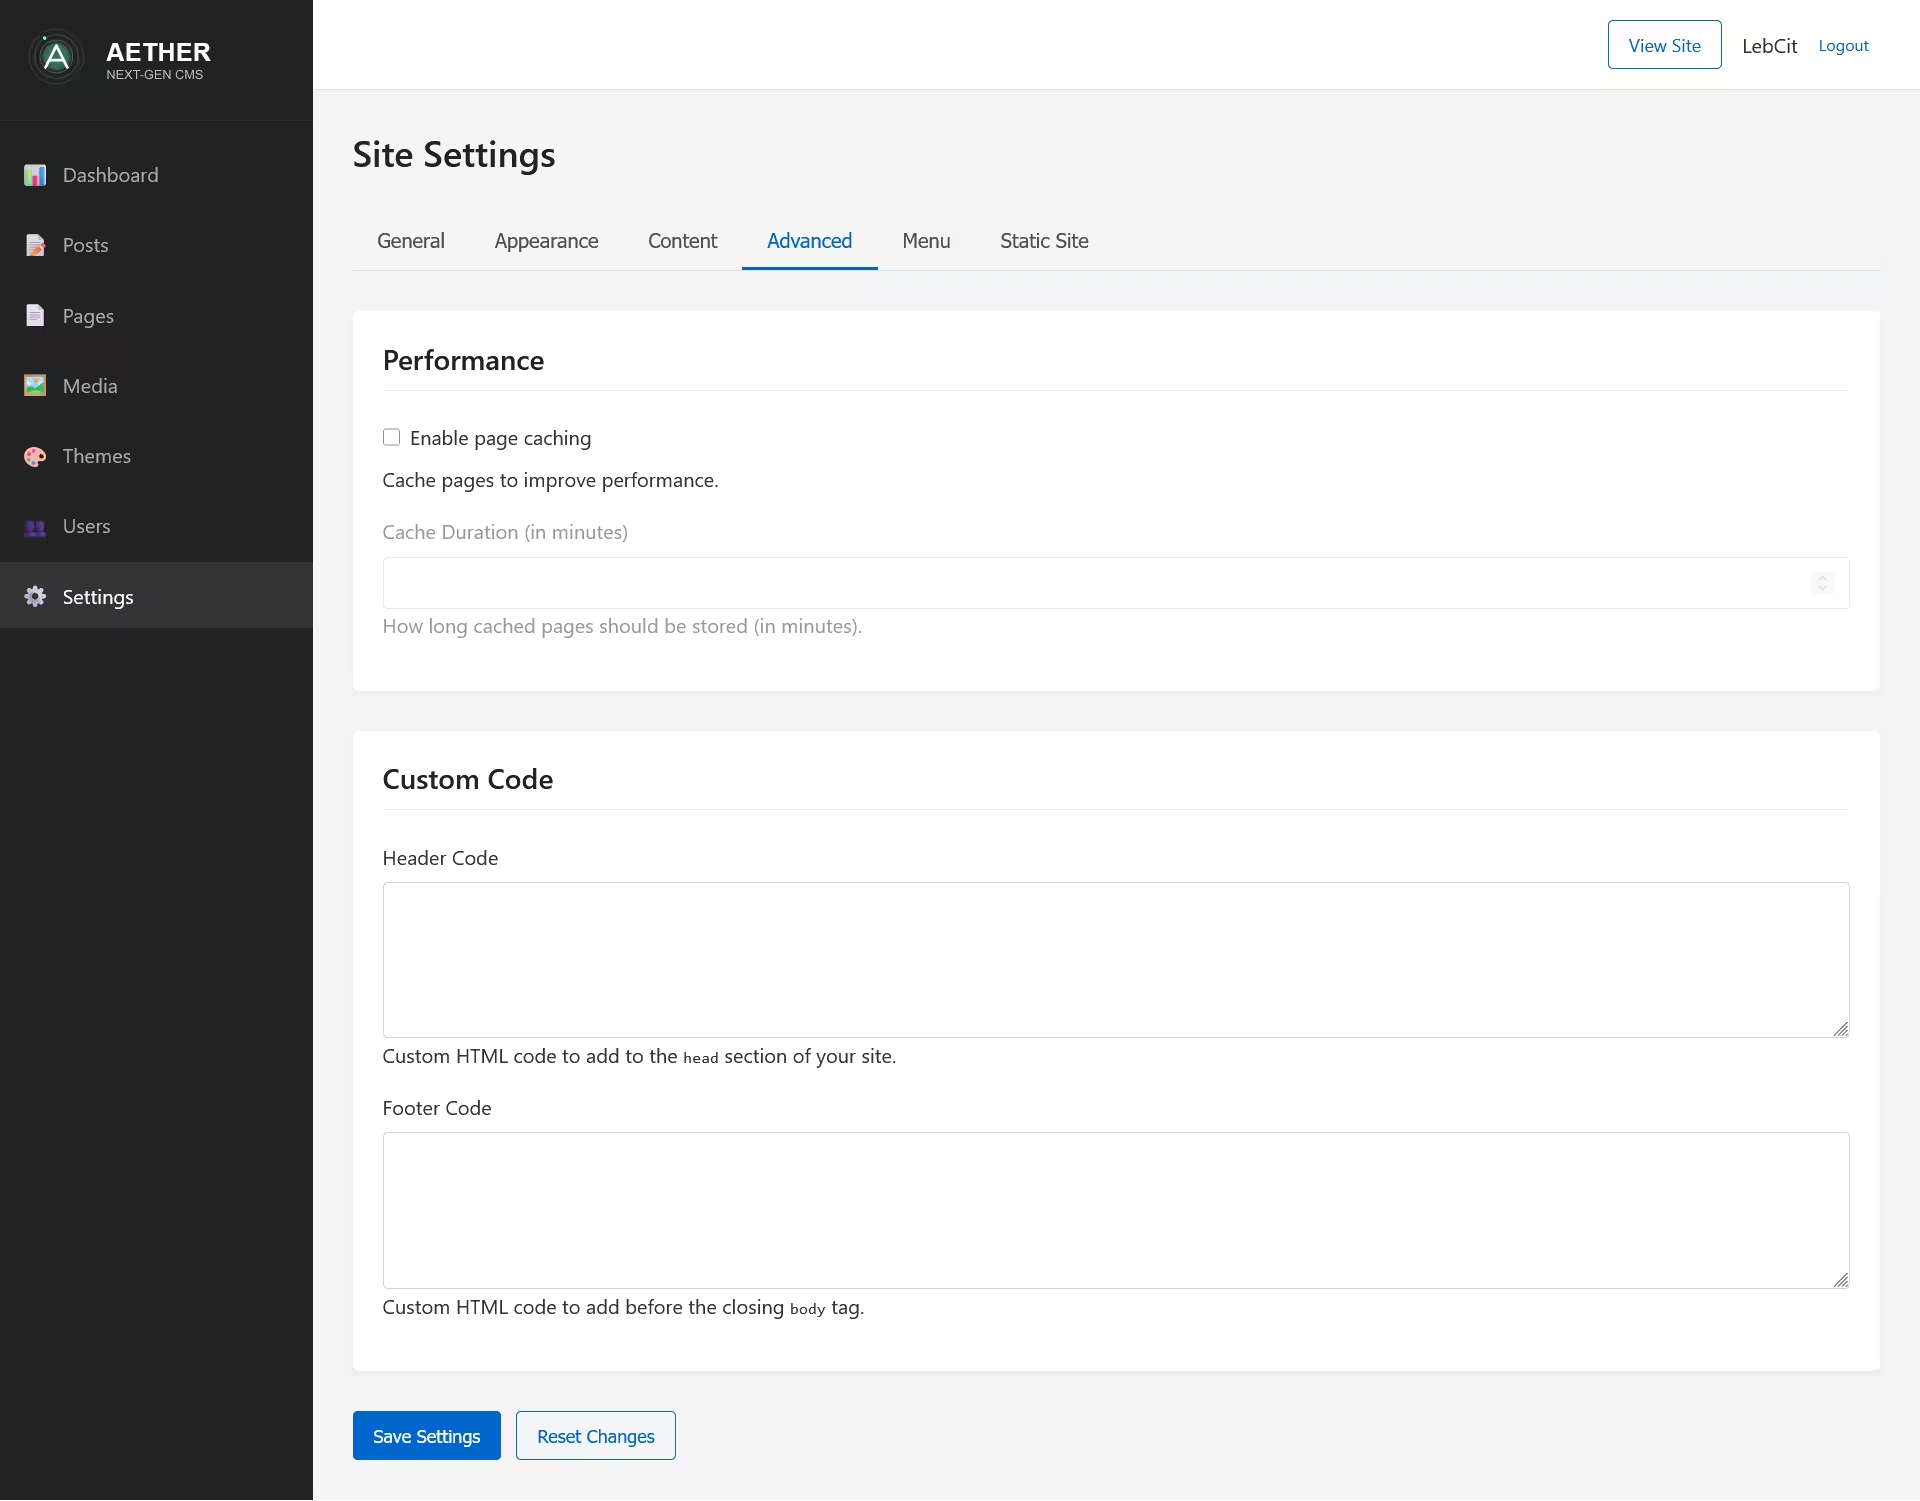
Advanced Tab
The Advanced tab contains technical and performance settings:
Performance
- Enable Page Caching: Toggle to enable or disable page caching
- Cache Duration: How long cached pages should be stored (in minutes)
Custom Code
- Header Code: Custom HTML code to add to the
<head>section - Footer Code: Custom HTML code to add before the closing
</body>tag
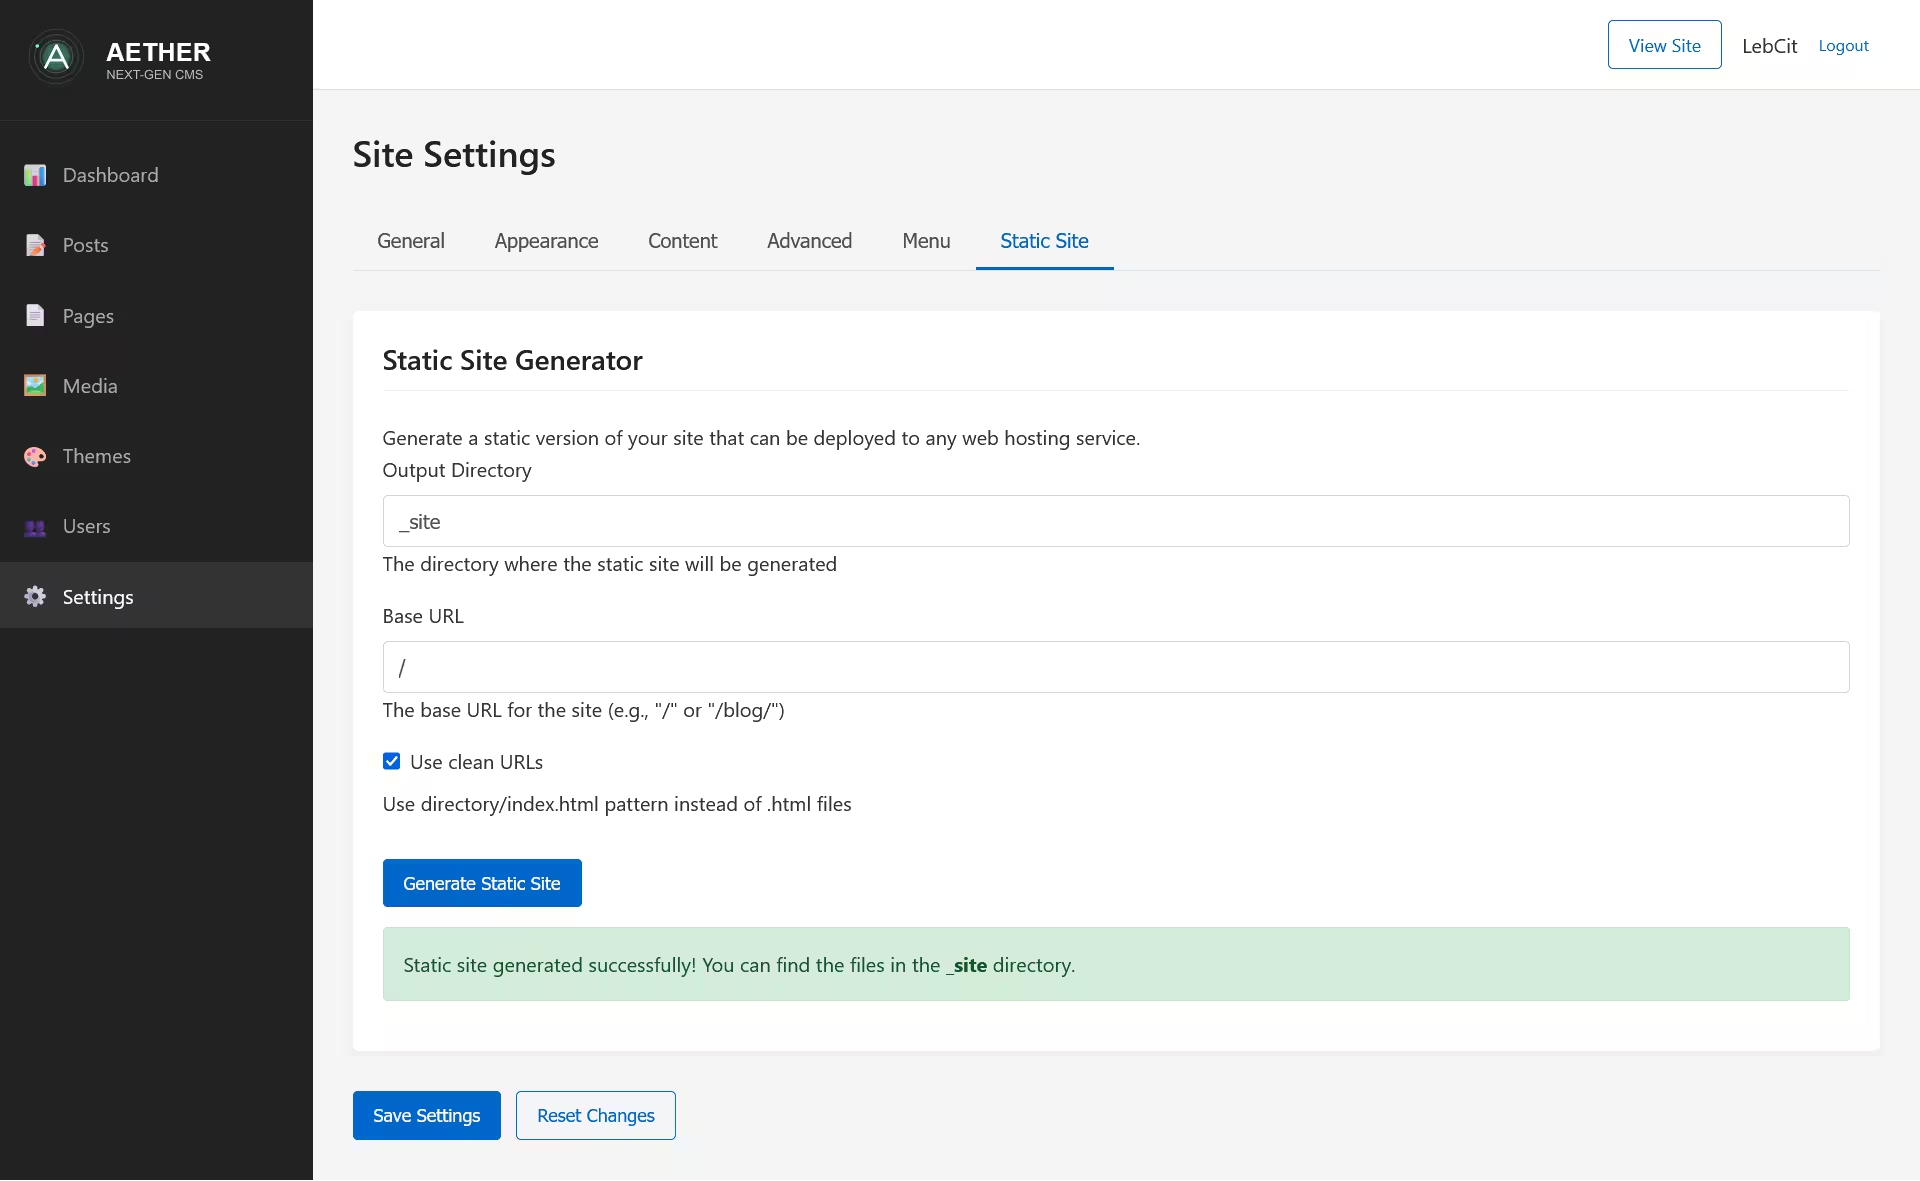
Static Site Tab
The Static Site tab (available to administrators only) provides options for generating a static version of your site:
Generation Options
- Output Directory: Where the static site will be generated
- Base URL: The base URL for the static site
- Use Clean URLs: Toggle to use directory/index.html pattern
Generation Controls
- Generate Static Site: Button to start the generation process
- Status Indicator: Shows the progress of the generation
- Result Display: Shows the result of the generation process

npm run build command.
Menu Editor
The Menu tab contains the Menu Editor, a powerful tool for creating and managing navigation menus for your site. Aether CMS implements a global menu system that works across all themes.
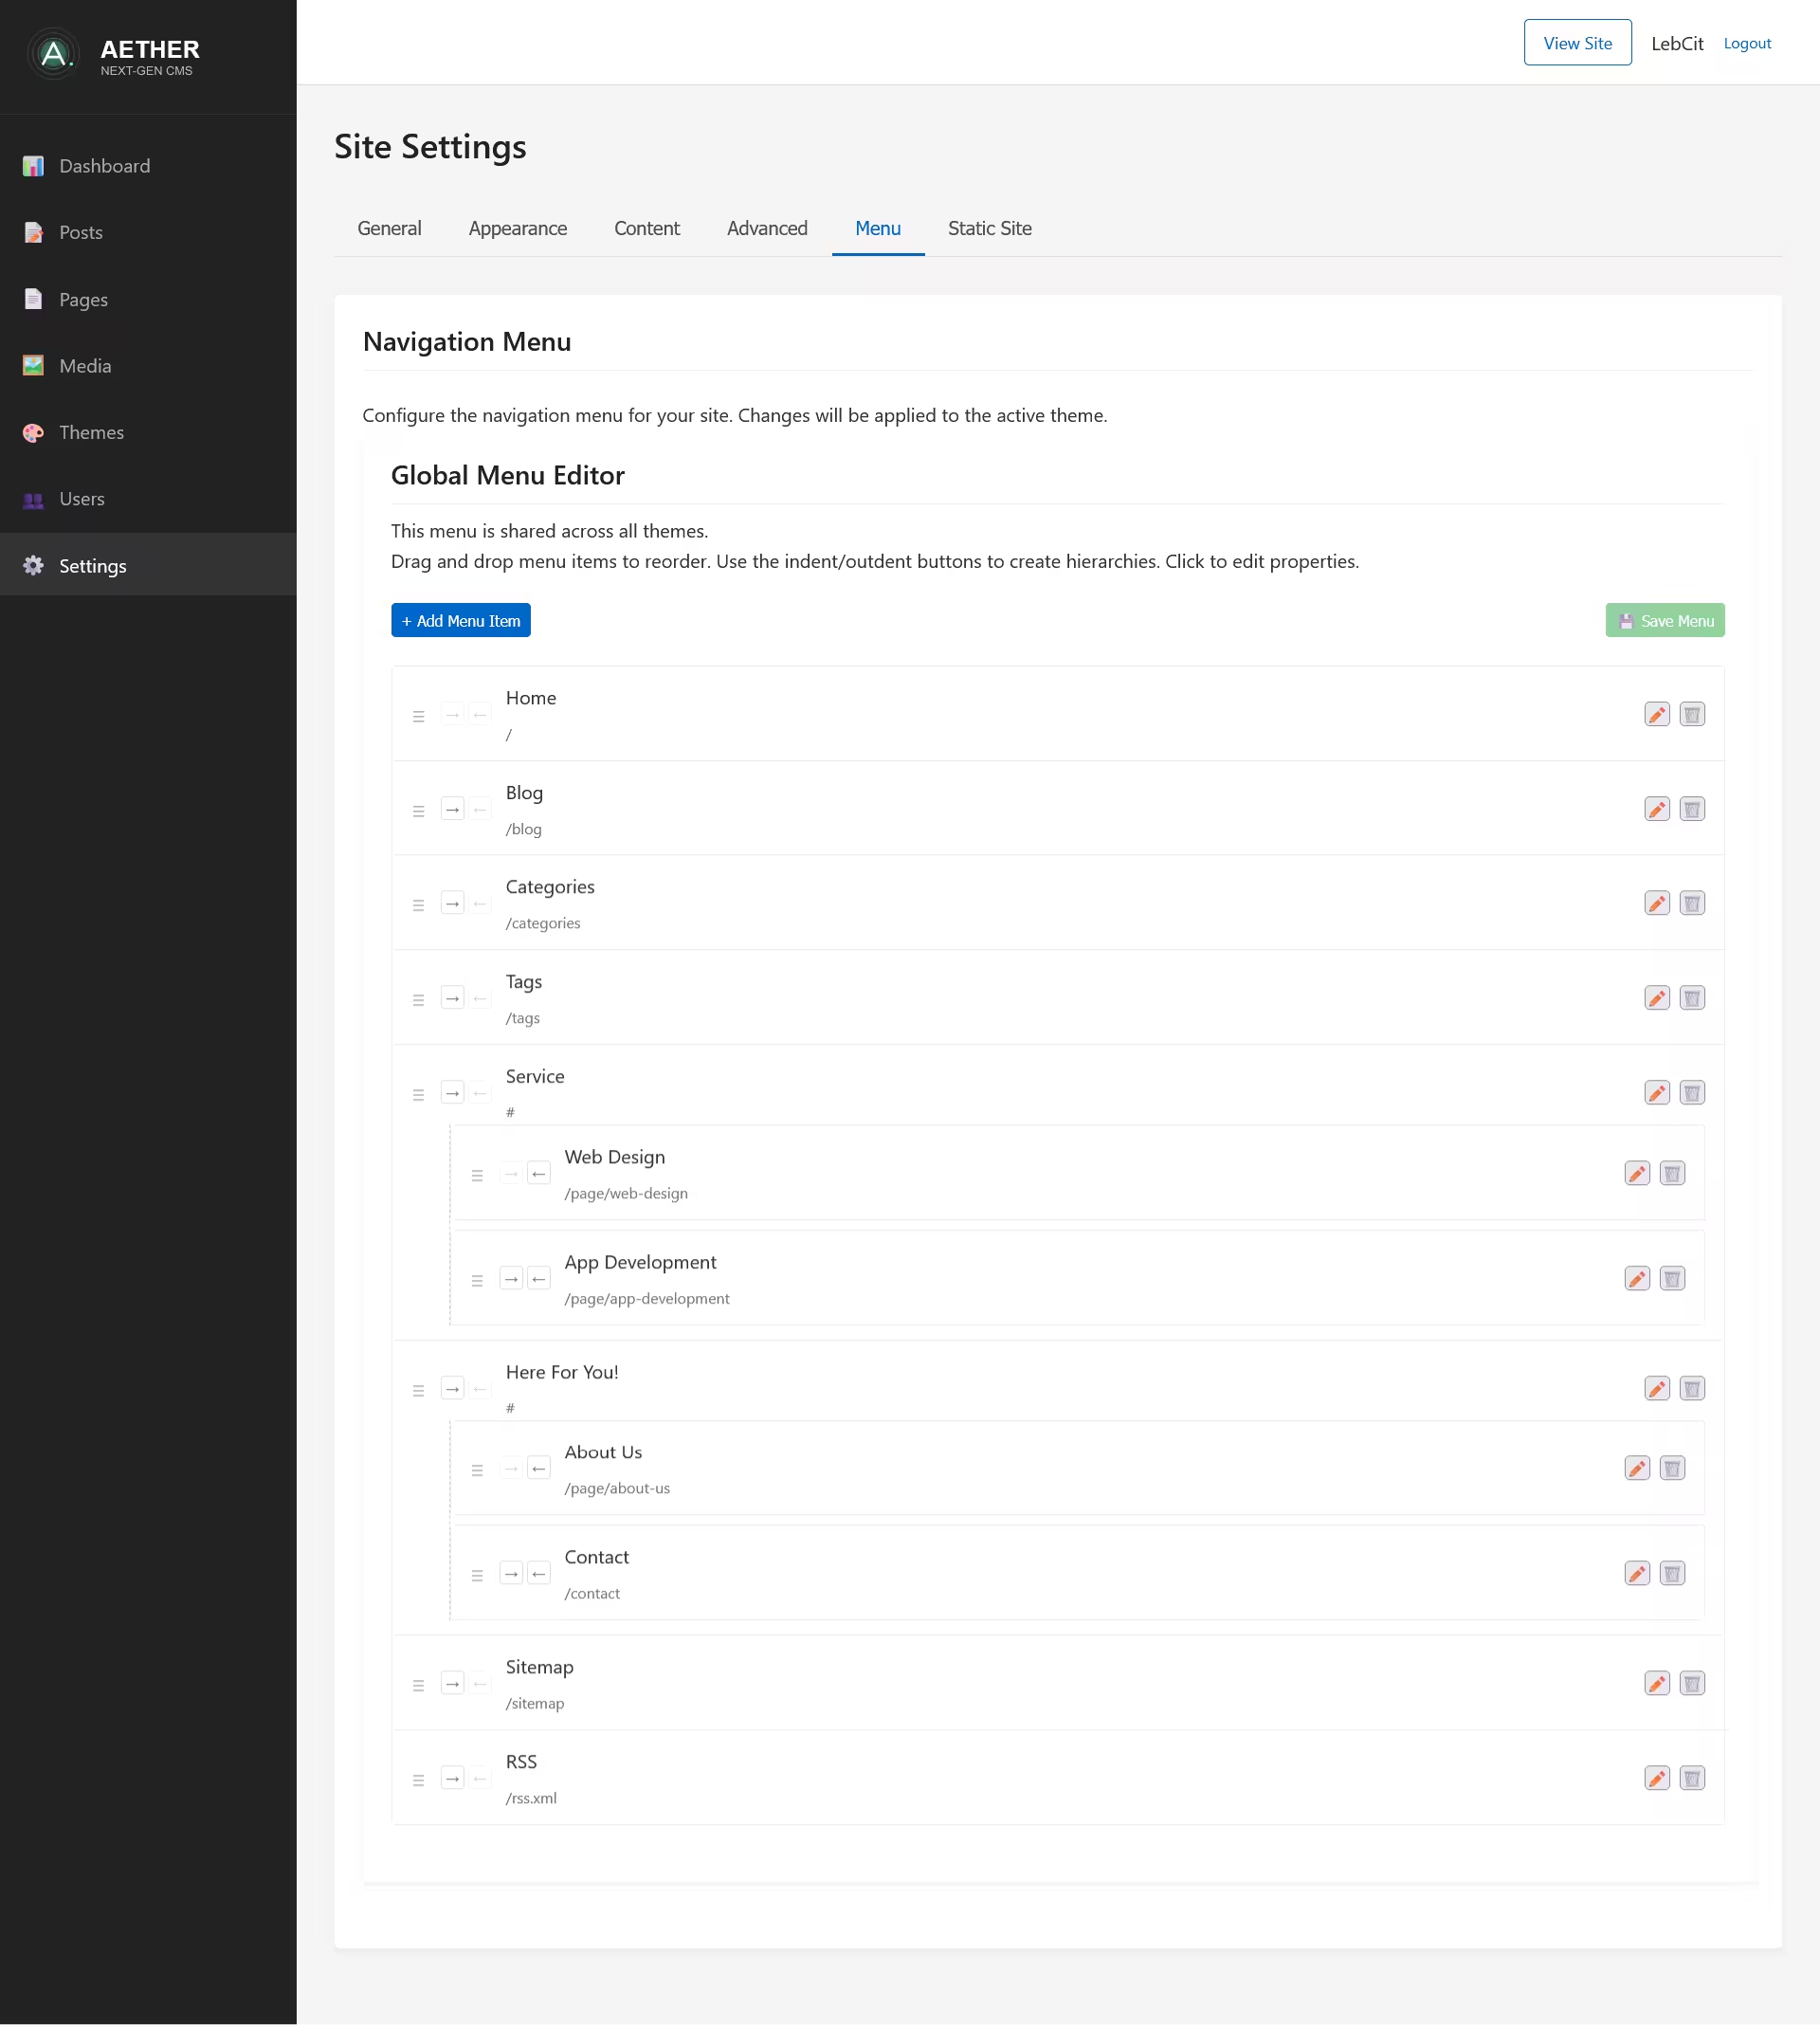
Menu Editor Interface
The Menu Editor consists of several key components:
- Editor Header: Contains the title "Global Menu Editor" and descriptive text
- Editor Toolbar: Provides buttons for adding menu items and saving the menu
- Menu Items Container: Displays the current menu structure in a hierarchical list
- Menu Item Form Panel: A modal panel for adding or editing menu items
- Backdrop Overlay: Darkens the background when editing menu items
Managing Menu Items
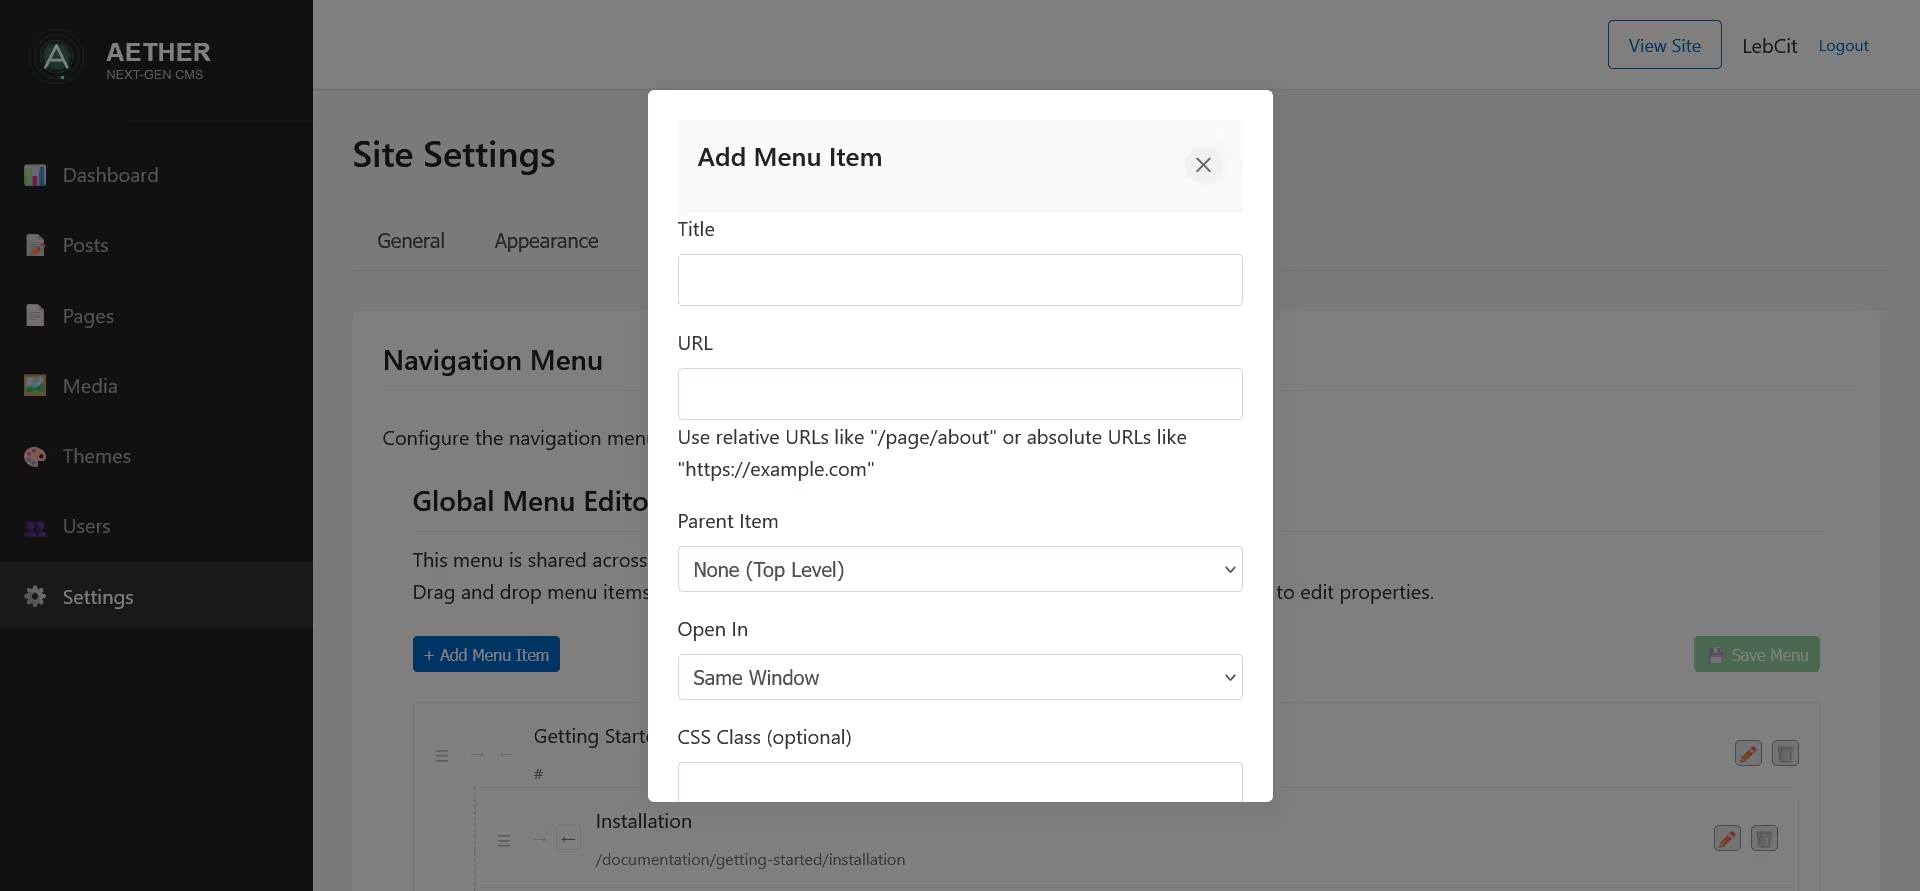
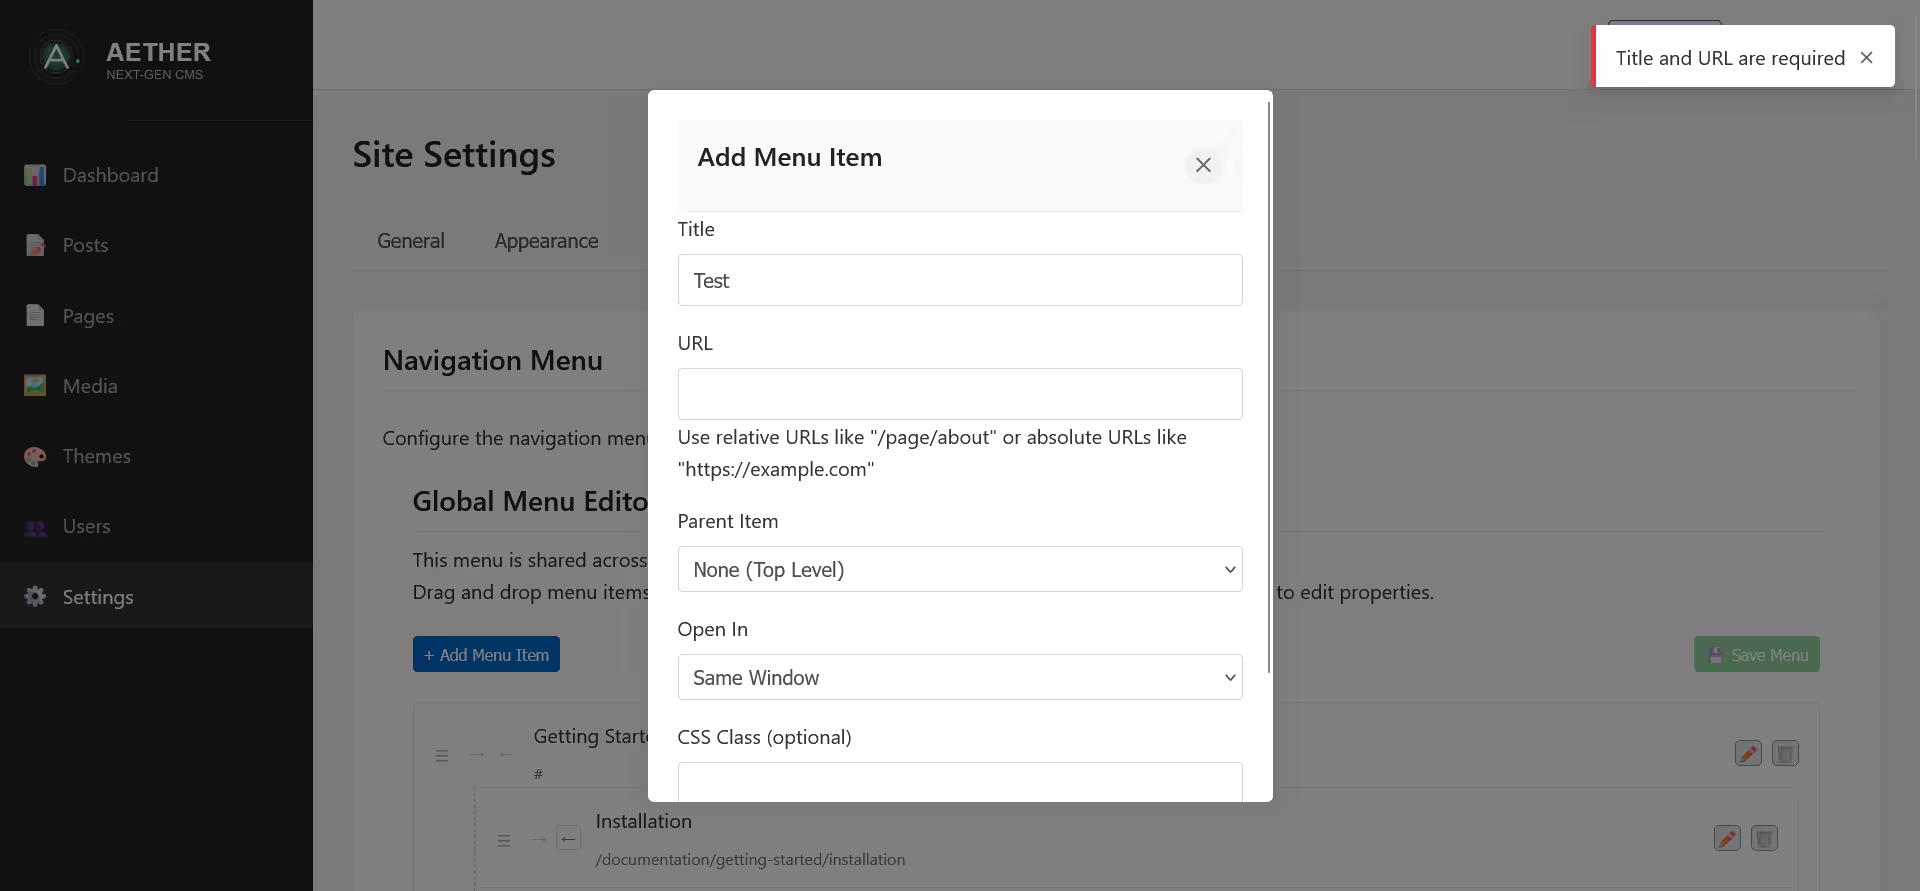
Adding Menu Items
To add a new menu item:
- Click the Add Menu Item button in the toolbar
- The Menu Item Form Panel will slide in
- Fill in the menu item details:
- Title: The text that will appear in the menu
- URL: The link destination (relative URLs like "/page/about" or absolute URLs like "https://example.com")
- Parent Item: Select a parent for nested menus (dropdown shows all available items)
- Open In: Choose "Same Window" or "New Window"
- CSS Class: Optional CSS class for custom styling
- Click Save to add the item to the menu
Editing Menu Items
To edit an existing menu item:
- Click directly on the menu item or the Edit button (pencil icon) next to the item
- The Menu Item Form Panel will slide in with pre-filled information
- Modify the desired fields
- Click Save to update the item
Organizing Menu Structure
The Menu Editor provides multiple ways to organize your menu structure:
Drag and Drop Reordering
Sortable.js integration enables intuitive drag-and-drop functionality:
- Hover over the menu item to see the handle icon (≡)
- Click and hold on the handle
- Drag the item to the desired position
- Release to place the item
Creating Hierarchical Menus
You can create multi-level menus using two methods:
Parent Selection Method:
- When adding or editing an item, use the "Parent Item" dropdown
- Select which item should be the parent
- The item will be nested under the selected parent
Indent/Outdent Method:
- Use the indent button (→) to make an item a child of the item above it
- Use the outdent button (←) to move an item up one level in the hierarchy
- These buttons are contextually enabled/disabled based on the item's position
Menu Hierarchy Rules
The Menu Editor enforces certain rules for the menu hierarchy:
- An item cannot be its own parent
- Items cannot create circular references
- The first item in a list cannot be indented (no previous sibling)
- Items at the top level cannot be outdented
Deleting Menu Items
To delete a menu item:
- Either:
- Click the Delete button (trash icon) next to the item in the list, or
- Open the menu item for editing and click the Delete button in the form
- A confirmation modal will appear
- If the item has children, a warning will be displayed
- Click Delete to confirm or Cancel to abort
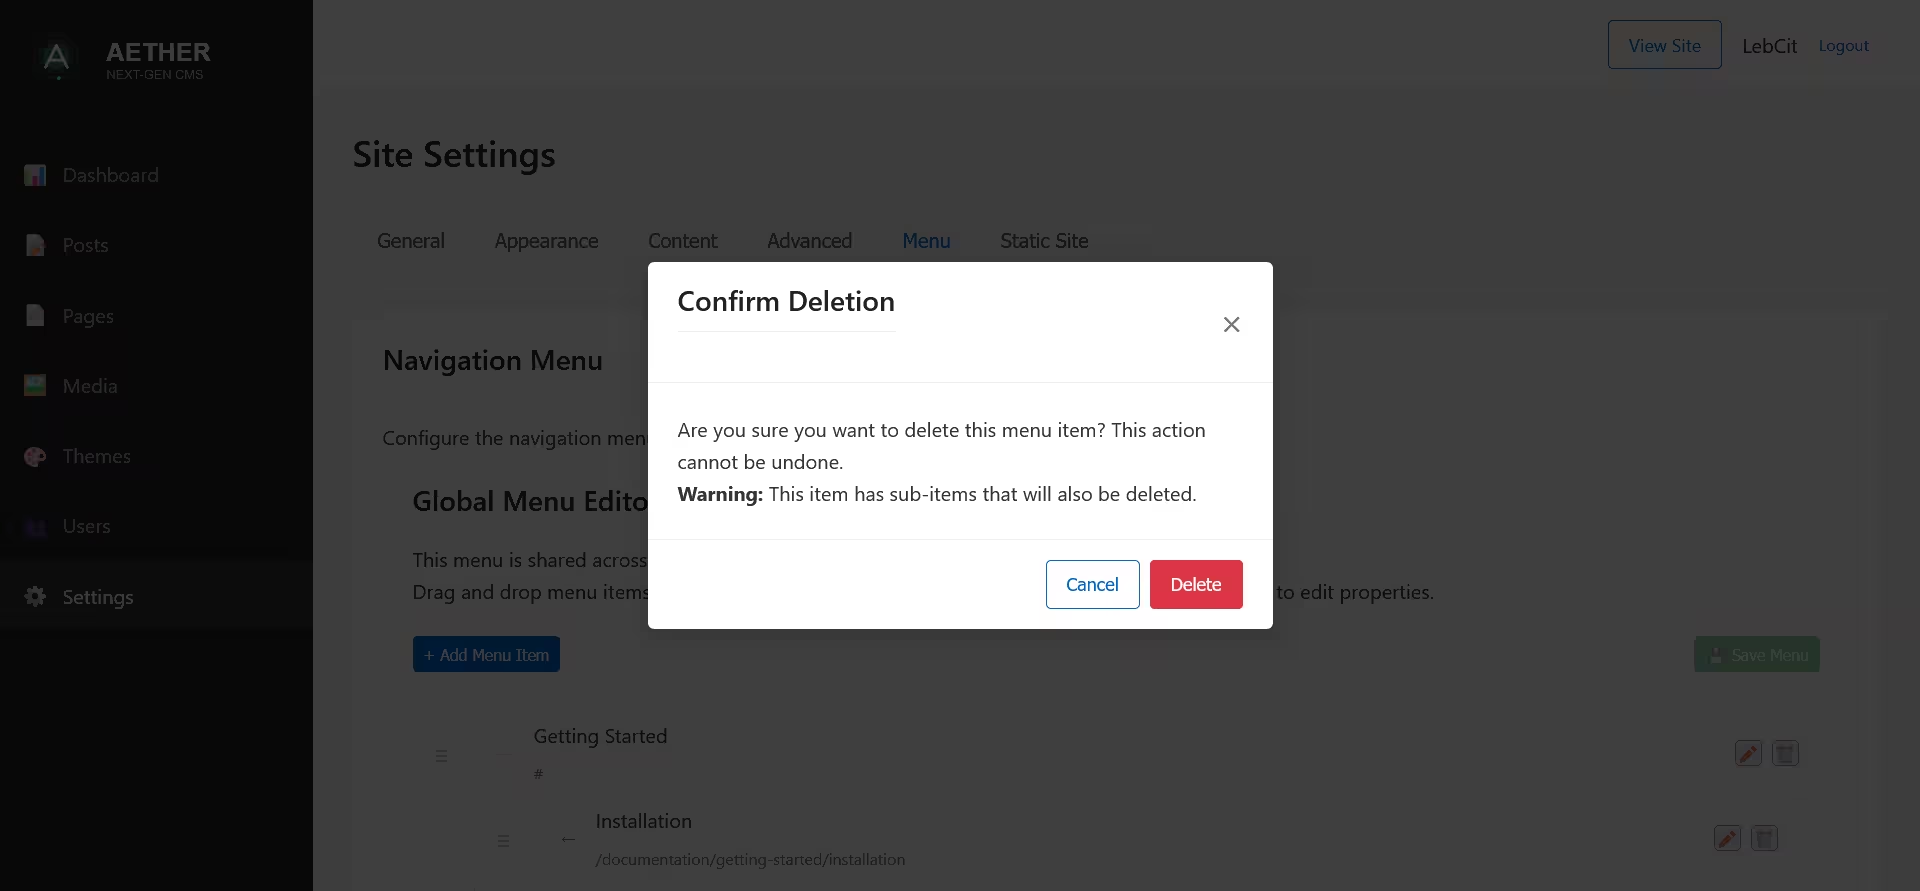
Note: Deleting a parent item will also delete all of its children (sub-menu items).
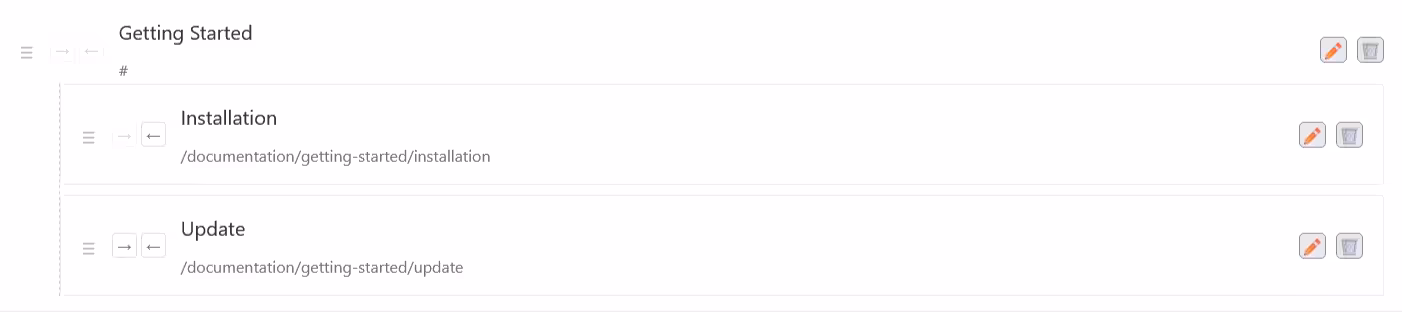
Visual Indicators
The Menu Editor provides helpful visual cues:
- Sub-menu items: Indented with a dashed vertical line indicating hierarchy
- Drag handle: Indicates draggable items
- Action buttons: Edit and delete options for each item
- Active save button: Indicates unsaved changes
Toast Notifications
The Menu Editor includes a notification system that provides feedback:
- Success messages: Confirm when items are added, updated, or deleted successfully
- Error messages: Alert you when operations cannot be completed
- Warning messages: Provide important information about potential issues
Saving Menu Changes
After making changes to the menu structure:
- Click the Save Menu button in the toolbar (it becomes active when changes are made)
- The system sends your menu data to the server
- A success notification appears when the menu is saved
- The menu is immediately updated across your site
The Save Menu button visually indicates the state of your changes:
- Inactive (faded): No unsaved changes
- Active (highlighted): Changes need to be saved
Menu State Management
The Menu Editor maintains the state of your menu throughout your editing session:
- Changes are tracked and highlighted
- The save button activates only when changes exist
- A warning appears if you try to leave the page with unsaved changes
- The menu structure is preserved during add/edit operations
Global Menu Implementation
The menu you create is global, which means:
- It's shared across all themes on your site
- Theme developers can style it according to their theme's design
- Changes to the menu structure is immediately propagated
Best Practices for Menu Creation
- Keep menu titles concise: Long menu items can break layouts
- Use clear, descriptive labels: Help users understand where links will take them
- Limit nesting depth: Deep hierarchies can confuse users (2-3 levels maximum)
- Group related items: Organize sub-menus logically
- Consider mobile users: Remember that deep menus are harder to navigate on small screens
- Use consistent styling: If using CSS classes, apply them consistently
- Test navigation paths: Ensure all menu items lead where expected
- Save frequently: Preserve your work as you make significant changes
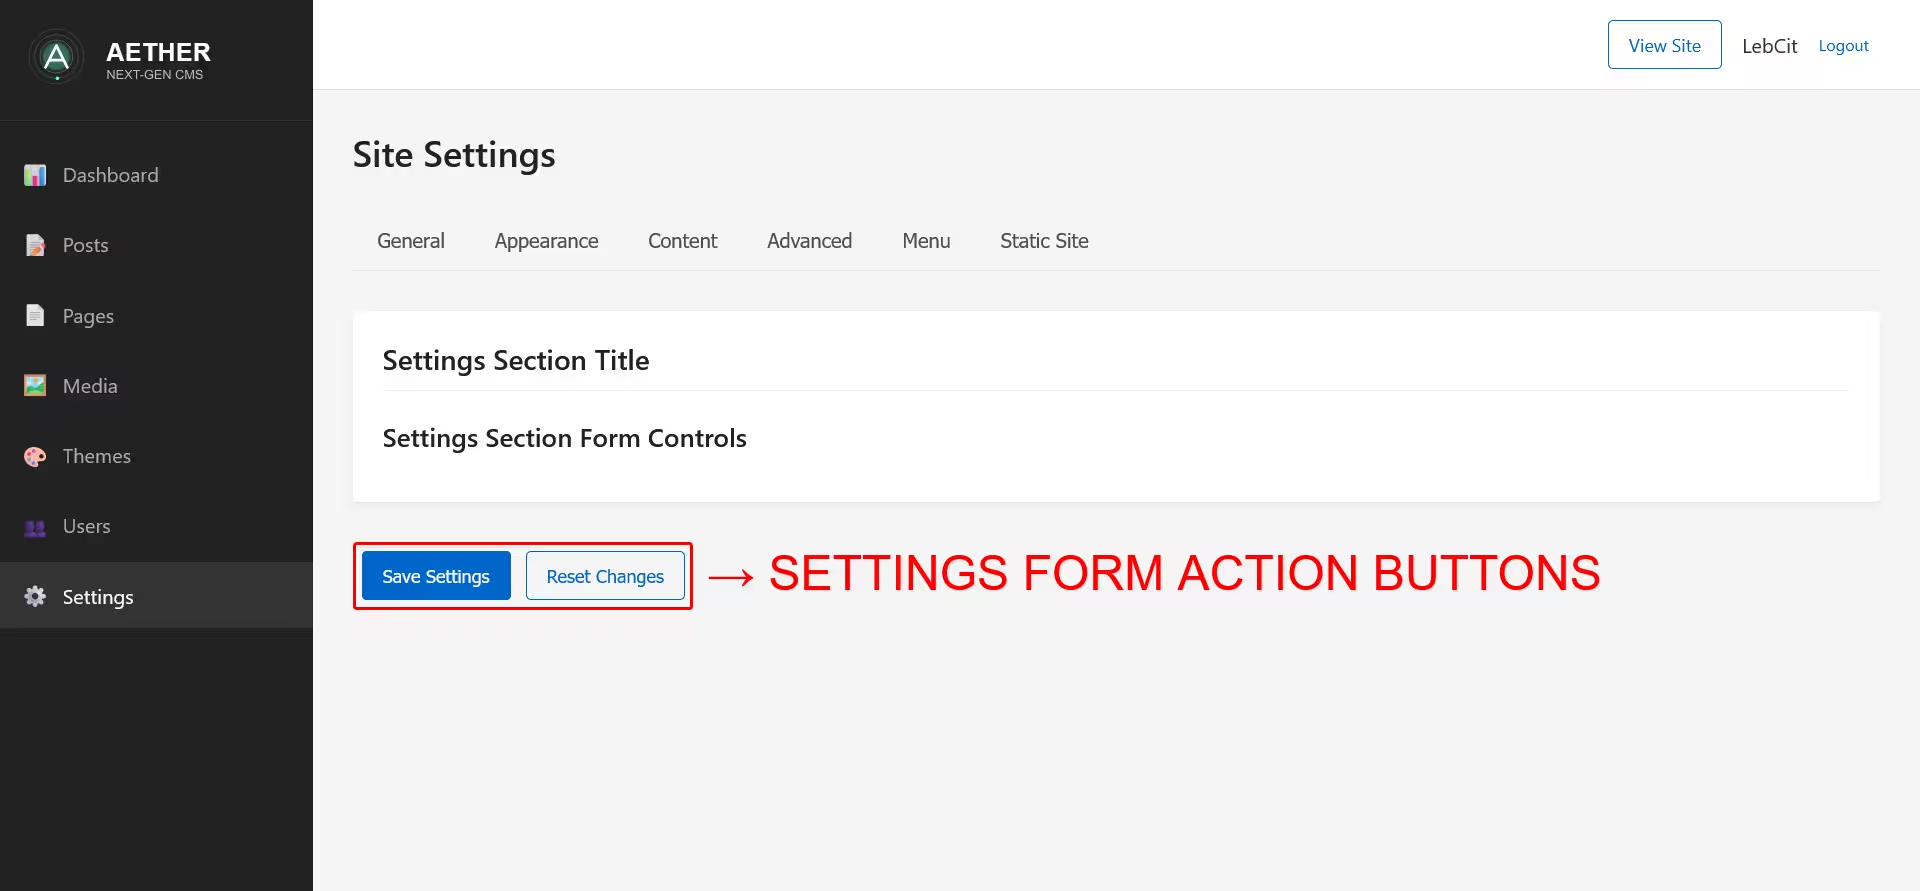
Form Actions
At the bottom of the Settings form, you'll find action buttons:
- Save Settings: Saves all changes made across all tabs
- Reset Changes: Reverts any unsaved changes to their previous values
Saving Settings
To save changes to your settings:
- Make the desired modifications across any tabs
- Click the Save Settings button at the bottom of the page
- A confirmation modal will appear
- Click OK to dismiss the modal
All settings are saved simultaneously, regardless of which tab they're on. This means you can make changes across multiple tabs before saving.
Resetting Changes
If you make changes but decide not to save them:
- Click the Reset Changes button
- A confirmation dialog will appear
- Click OK to revert all unsaved changes
This will reset all unsaved changes across all tabs to their previous values.
Media Selection Modal
When selecting media for logos, icons, or other settings:
- Click the selection button (e.g., Select Logo)
- The Media Selection Modal will appear
- Browse and select media from your library
- Click Select to choose the item
- The modal will close, and the media will be applied
![]()
The Media Selection Modal provides:
- Search functionality
- Media filtering
- Preview of selected items
- Option to go to the Media Library
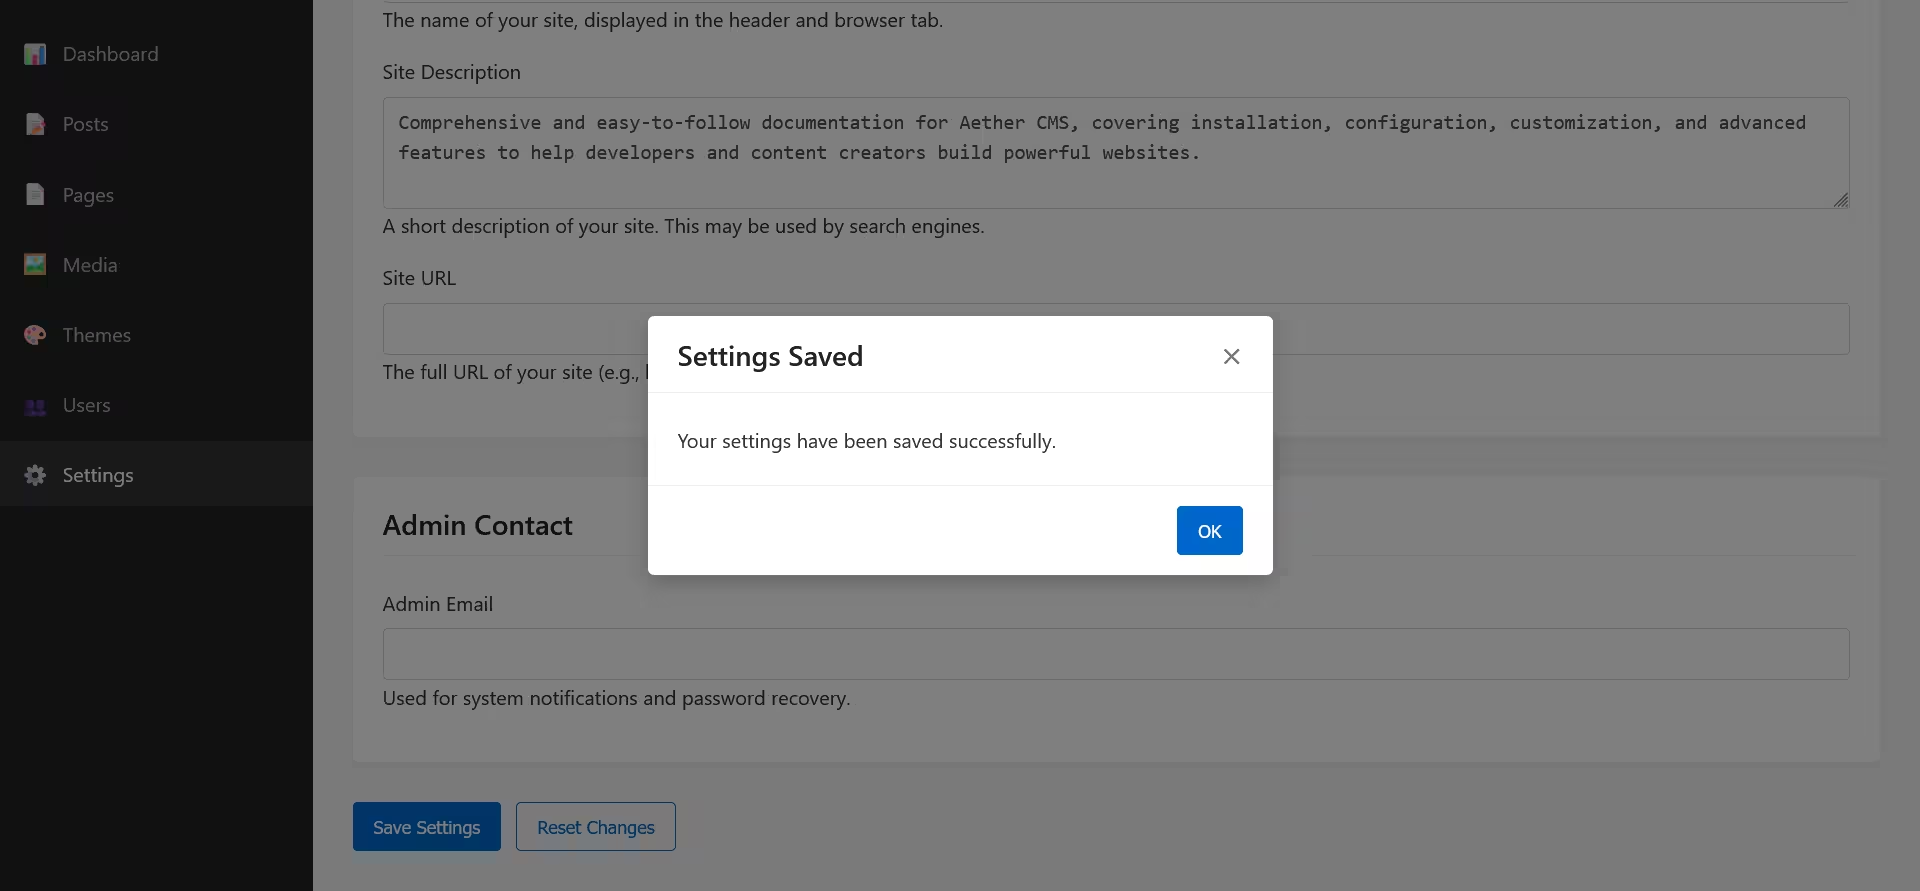
Save Modal
After saving settings, a confirmation modal appears:
- Shows "Settings Saved" message
- Provides an OK button to dismiss the modal
This confirmation ensures you know your changes have been successfully saved.
Dependent Fields
Some settings are dependent on others and will be enabled or disabled based on parent settings:
- Cache Duration: Only active when Enable Page Caching is checked
- Comment Moderation: Only active when Enable Comments is checked
Disabled dependent fields are visually de-emphasized with reduced opacity.
Responsive Behavior
The Settings interface is fully responsive:
- Desktop: Displays tabs horizontally with full form width
- Tablet: Adapts tab navigation to available space
- Mobile: Tabs become more compact, and form elements stack vertically
The Menu Editor is also responsive:
- Menu item controls adapt to smaller screens
- Edit form appears optimized for the available space
- Drag-and-drop functionality works on touch devices
Static Site Generation
The Static Site Generator creates a complete, static version of your site that can be deployed to any web hosting service.
Generation Process
To generate a static site:
- Configure the options in the Static Site tab
- Click the Generate Static Site button
- The generator will create static files of your entire site
- A success message will appear when complete
Static Site Options
- Output Directory: The directory where files will be generated (default: "_site")
- Base URL: The URL path for the static site (default: "/")
- Use Clean URLs: Creates directory/index.html structure instead of .html files
Generation Results
After generation completes:
- Success message shows the output directory
- Files can be found in the specified directory
- The static site is ready for deployment
Security Considerations
The Settings section includes several security features:
- Only administrators can access certain settings
- Critical settings require confirmation
- Custom code fields are clearly marked as advanced features
- User inputs are validated before saving
Best Practices for Settings Management
- Document your settings: Keep a record of important configuration changes
- Test changes on non-production environments when possible
- Regularly review settings to ensure they remain optimal
- Use meaningful menu names that clearly indicate destinations
- Keep menus simple and organized for better user experience
- Consider mobile users when designing menus and navigation
- Be cautious with custom code additions to prevent conflicts